As an interior designer, I find DIY challenges even more challenging than a layperson, as I strongly adhere to repurposing, upcycling, reusing and recycling principles in my practice and my designs. At home and professionally, I would say I am gung ho with a can-do attitude, girl-with-a-gun, all-round practical person. I find pragmatism cathartic. I am problem-solving by nature. This is an easy weekend DIY interior design task that took 1 hour and 20 minutes and cost £30 ($39). I have always wanted a Hollywood style lighting up vanity mirror as they are very classic and attractive but expensive. I have been looking for years. One of the main aims of doing DIY is to save money and secondly to customize something to your exact requirements.
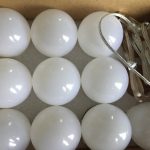
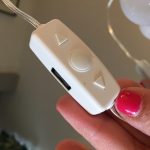
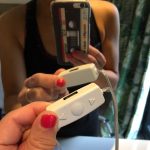
First I had to actually spend money (yeah, I know). After scouring thrift stores, I could not find any mirror of the right size. I then had to make the trip to IKEA to buy this £20 ($26) round steel framed mirror. (The bezel is steel, not wood, that’s why the frame is a few mm thin only). Then I had to spend more money, buying a kit of 10 bulbs, strong double-sided tape, instructions, dimmer and wiring. The first thing I did was get a USB socket and test the dimmer. The best feature is that the dimmer can adjust not just brightness but cold to warm setting. There are so many suppliers doing these kits on Amazon and eBay. The cheapest deal I found is about £9 ($11) including delivery.
This is all you will have to spend.
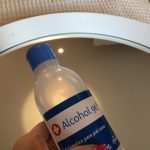
Use alcohol to clean the entire mirror frame and mark 9 equidistant sections. You might want to do this on AutoCAD to divide segments or arcs of circumference accurately. I did this by eye because of years of experience in architectural drawing HOWEVER do not make the mistake I made which was divide by 10 segments when there are 10 bulbs! This is a trick and easy error to make! The moment I did the 10, I knew what had happened and had to start again.
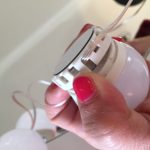
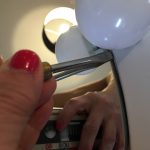
Carefully dismantle the base of one light AT A TIME to get at the wiring. Pull it out without the whole length coming out. Stick the lights one AT A TIME onto the mirror frame using strong double sided tape. After each one, adjust the wiring such that it’s equal lengths, roughly and tuck back any spare into the base of the light. The in and the out of the wiring should be from the same hole so as to be able to conceal it within mirror frame in the next step. This bit is very fiddly. I had to do it 3 times to prevent entanglement.
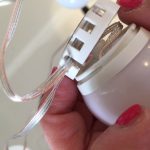
When all 10 are stuck down, use a flat bladed screwdriver to gently shove the wiring back into the mirror frame.
Lastly, hide the dimmer and again double-side tape it either to the back of the mirror frame or the vanity top/dressing table top. I did the latter. You will not see the dimmer unless you put your finger behind the top to get at it.
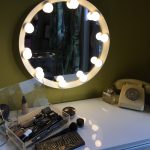
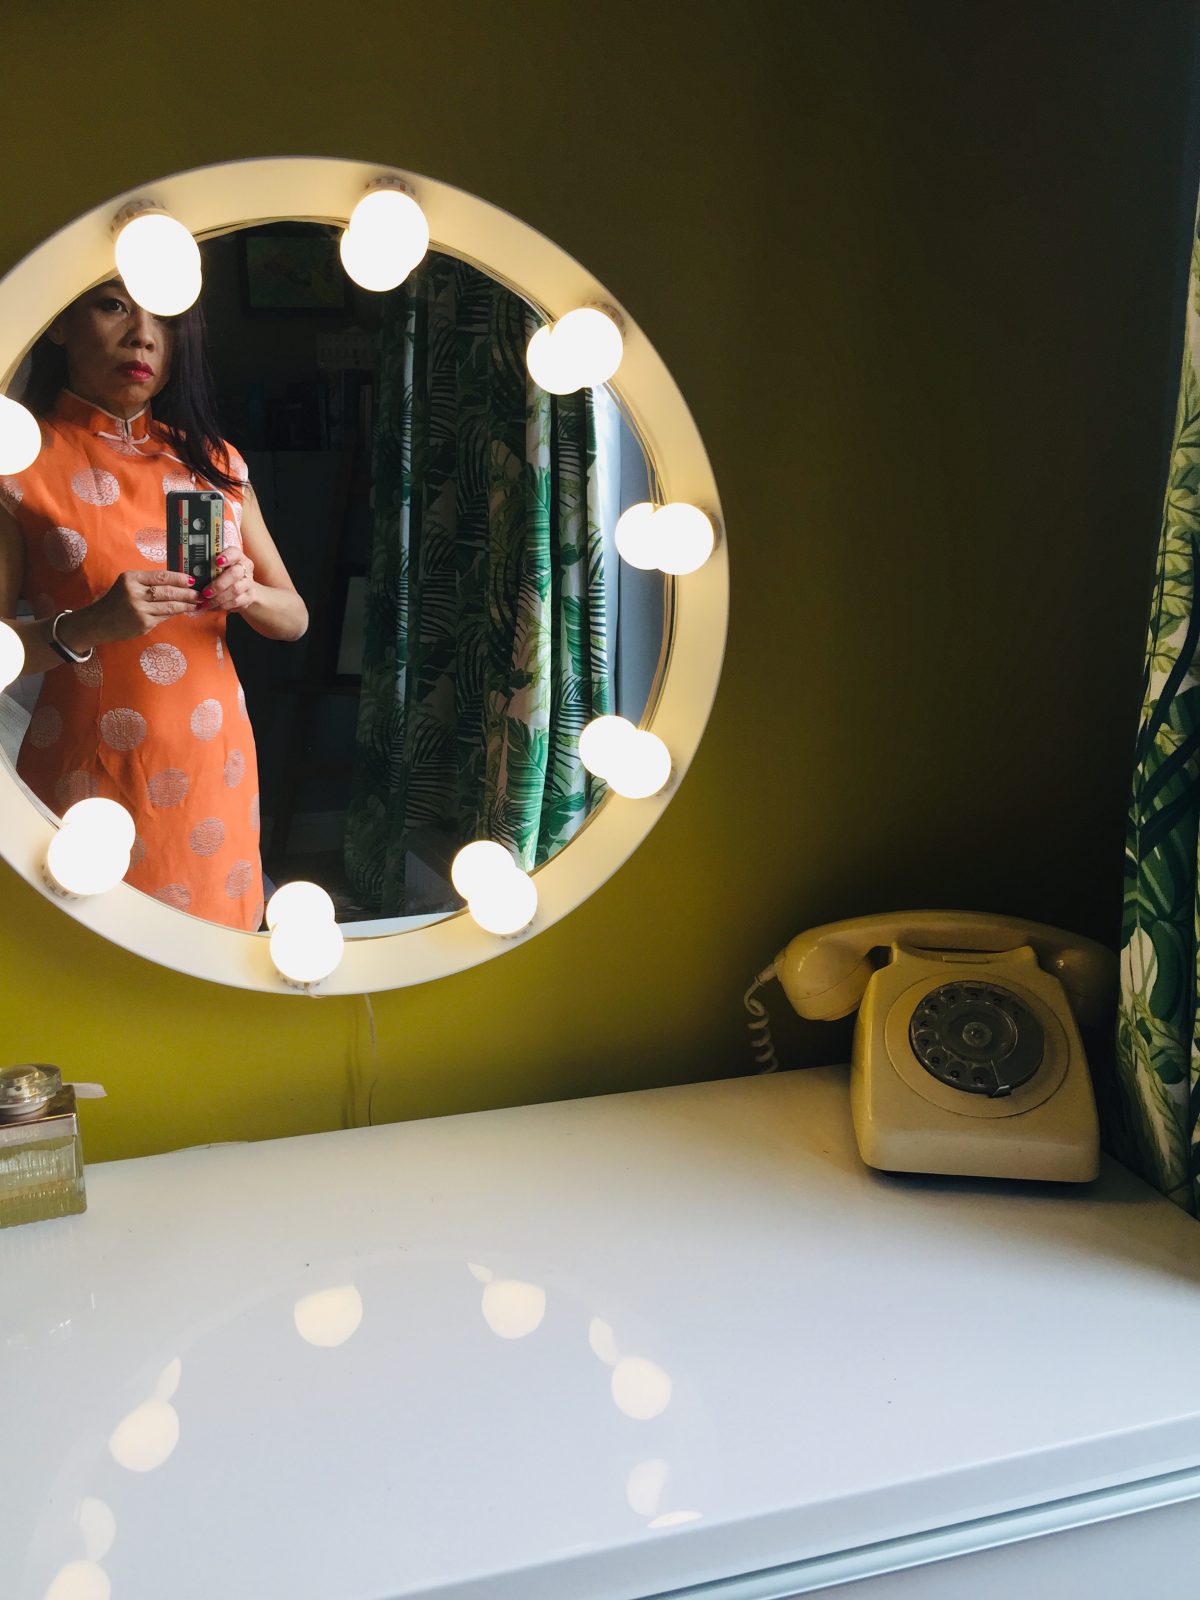
Wa-lah! Enjoy your lighting up makeup mirror. You and/or your spouse will be able to do immaculate makeup for every day and special occasions. Not to mention my new hobby – blowdrying. I find the mirror very attractive and adds to the ambience of a bedroom, bathroom, dressing room or getting ready area.
AFTER
Use alcohol to clean the entire mirror frame and mark 10 equidistant sections.

 First I had to actually spend money (yeah, I know). After scouring thrift stores, I could not find any mirror of the right size. I then had to make the trip to IKEA to buy this £20 ($26) round steel framed mirror. (The bezel is steel, not wood, that’s why the frame is a few mm thin only). Then I had to spend more money, buying a kit of 10 bulbs, strong double-sided tape, instructions, dimmer and wiring. The first thing I did was get a USB socket and test the dimmer. The best feature is that the dimmer can adjust not just brightness but cold to warm setting. There are so many suppliers doing these kits on Amazon and eBay. The cheapest deal I found is about £9 ($11) including delivery.